Showing posts with label food. Show all posts

Wednesday, April 11, 2012

What's For Dinner?: Crab Arugula Salad


 I know, this all sounds pretty exotic, right? Well, not really. Readily available ingredients and basic equipment is all you need, and about 30 minutes to whip up something that seems pretty impressive. Hey, if I could do it in 20 minutes including taking a bunch of pictures, surely you can do it in 30! 
Crab Arugula Salad

To begin, make the dressing first:

dressing ingredients and equipment
The ingredients you will need (from left to right): dijon mustard- any brand is fine, ground black pepper, 2 eggs, salt, vegetable or canola oil, a lime, and most importantly is the food processor. Don't worry if you don't have one, an electric mixer or immersion blender would work. I suppose you could do it by hand if you really want to, but make sure you have uber strength in your arms and lots of stamina! Go buy a machine already! 


I used to just buy the cheap machines and treat them as semi-disposable. I would use them for a few years until they broke or the blade was too dull to cut and then I would buy a new one. Then I finally realized if I bought a good one it wasn't that much more expensive and it would last a lot longer. I have the basic medium-sized Cuisinart model, which comes with a general purpose top, and a chopping top and blades. Pictured here is the general purpose top.


The Cuisinart food processor has a tiny cup/stopper that goes in the center hole of the lid to prevent stuff from flying out, and it also has a nifty feature which I will use when preparing the dressing, which is essentially homemade mayonnaise using lime instead of lemon. 

Cuisinart Food Processor lid cap

See the little lid with tiny hole in the center? The hole is the perfect size for adding the oil at the ideal rate for making mayonnaise. I will explain more as we move along.


how to separate an egg
To begin, separate your egg yolks from the whites and put yolks in the bowl of your food processor. Don't be squeamish, just crack it into your hand and gently let the whites run through your fingers into the sink (or container for use in something else). Add 1 tsp dijon, 1/2 tsp salt, 1/4 tsp pepper, and 2 tbsp lime juice (about 1 lime). Put the top on the processor and turn on the machine. When I'm blending small quantities I sometimes tip the entire machine at an angle so all the "goodies" go to one side and get mixed by the spinning blade. 


adding the oil with machine running


Now, put the little cup (if you have one) onto the lid and begin filling it with 2/3 cup vegetable oil. Just keep refilling it as it runs out into the bowl of the processor. If you don't have this feature, just pour it VERY slowly through the opening in the lid. 


See how slowly I mean by checking out the picture here:
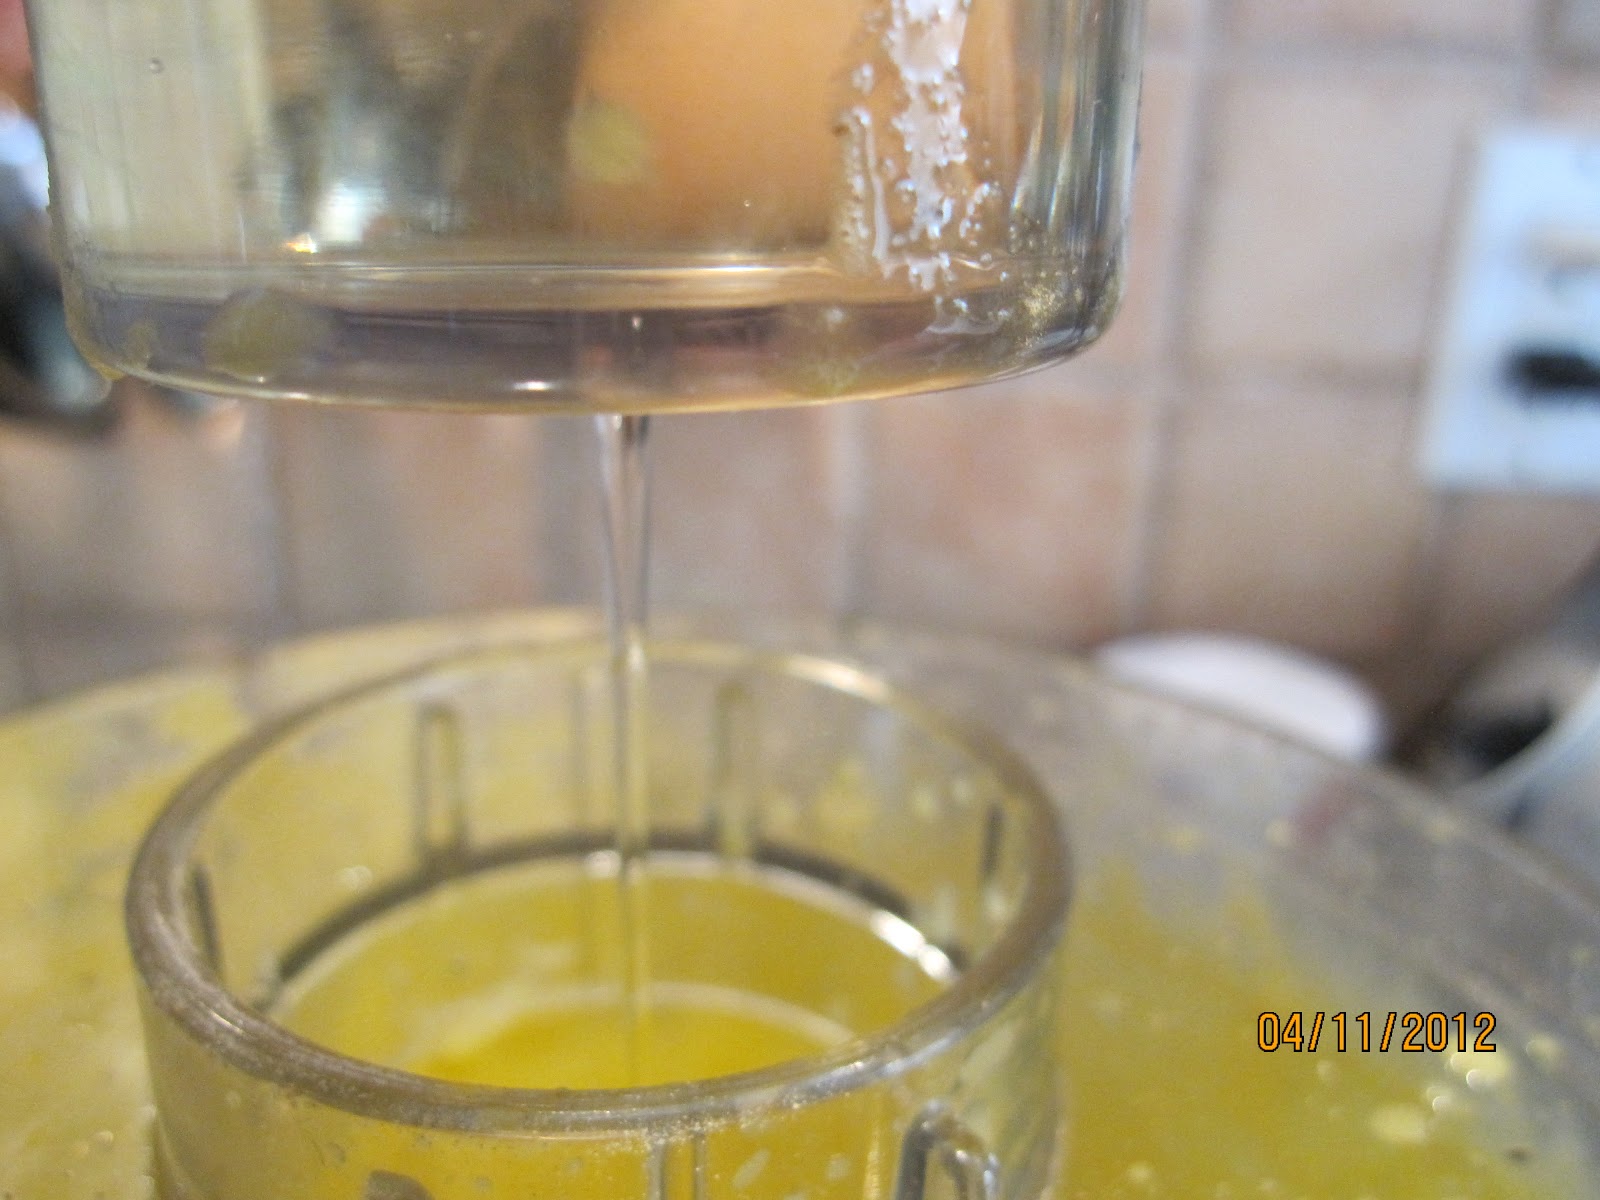
a very slow trickle of oil into the mix is critical


Once you have added all the oil, you will have a nice thick white-ish mayonnaise. I'm using this as the main dressing for the salad. You could easily double the recipe and keep half of it in the refrigerator for a week or so to use on sandwiches and such. Won't your family be impressed?

finished mayonnaise dressing


peeling the jicama


Now to finish up, peel a small jicama (hick-uh-muh)- a brown bulb vegetable with texture and taste similar to raw potato or water chestnut. I like to peel it by cutting off both ends to a make flat surface for sitting on my cutting board, then I whack off the outer peel with my chef's knife. You could use a regular peeler or paring knife if you prefer.


jicama matchsticks
Once peeled, cut the jicama into thin slices(1/8-1/4" thick), lay the slices on their sides in a stack and cut again into strips (matchsticks). Put the jicama in a mixing bowl and pour juice of 1/2 lime, and 1 tbsp olive oil, salt and pepper to taste over the top of the jicama. Mix well. 


mixture of fresh arugula and baby spinach
Now toss this mixture with 1-2 cups fresh arugula leaves, or combination of arugula and baby spinach leaves. Arugula has a strong peppery taste that some people (my kids) find objective. If I'm making this for adults I do just the Arugula, but for the kids I mix half and half with spinach. Toss well with the jicama to coat the leaves with a little of the oil and lime juice mixture on the jicama.


16 oz can crabmeat in the refrigerated section of your market

In a separate bowl mix 1 pound crab meat-I bought this 16 oz can in the refrigerated section at Trader Joe's for about $8. WOW! What a deal! Sure, you could use fresh crab, (are you rich?) or even use imitation crab if your budget is really tight, which makes this an affordable every-day option. In with the crab, I mix 2-3 green onions, sliced up (green AND white parts), 1/2 cup chopped fresh cilantro, and all of the mayo dressing we made up above.

Here it is all mixed up with the dressing:


dressed crab meat mixture
All you have to do is plate it all up together. Put the greens and jicama mixture on a platter or low bowl, and scoop the crab mixture into the center. Garnish with a little fresh cilantro leaves and a wedge of lime and avocado slices. 


Enjoy!  (ingredient list follows)


Crab Salad:


16 oz crab meat
2-4 green onions, green and white parts, chopped
1/4-1/2 cup fresh cilantro, chopped


Green Salad:


4 cups fresh arugula leaves (or combination of arugula and baby spinach)
juice of 1/2 lime (approx 2 tsp)
1 tbsp olive oil
salt and pepper to taste


Mayonnaise Dressing:


2 egg yolks
1 tsp dijon mustard
1/2 tsp salt
1/4 tsp pepper
juice of 1 lime (2 tbsp)
2/3 cup vegetable or canola oil


Preparation time: 30 minutes
can be made ahead, leave dressing off green leaves until ready to serve to prevent wilting. Hold in the refrigerator up to 2 days.


Saturday, April 7, 2012

Hoppy Easter Everyone!

Today was all about gardening, but I did take some time to make some eggs tonight. So, to update my earlier post on Totally Awesome Eggs, I thought you might like to see pictures of my latest creations, with a lot of help from my 11-yr old son. While the control freak in me would like the colors to be darker and the patterns a little more all-over, ... it's not about me this time! The little guy had a great time cutting up neck ties and wrapping the eggs. So what if they aren't all perfect? I hadn't noticed the bag of ties I collected were predominantly in the red family until the eggs were done. :0)


Anyway, don't eat too much candy tomorrow! I'll be attempting to figure out what to do with all those boiled eggs and there just might be a recipe coming. 

Thursday, April 5, 2012

April Fool's

What did you guys do for April Fool's Day? Nothing? Yeah, that's what I figured. Here's what I did... I know what you're saying, "it's a little late now!" Well, maybe you can file this away in your thinking cap for next year then. Do you file things in your thinking cap? Anyway...


I made "Grilled Cheese" Sandwiches and "Cupcakes". What's that?... You don't see anything so great about those? Check it out then smarty pants! Just like I said. Except it isn't. 


Okay, so the sandwiches are actually poundcake that I made from a mix (don't tell on me). I sliced it after it cooled off and then toasted each slice in the toaster. Then take a can of frosting (again with the judgement?) and I added some yellow and red food coloring until it looked roughly the color of that crappy American Cheese-food stuff that comes all wrapped in individual slices. GROSS. Anyway, the trick is to slather it on kinda thick so it oozes out just a little when you put the two slices together to form the sandwich. Then slice them in half and put on a plate. Totally convincing, right?!


For the "cupcakes" I made my usual meatloaf, even snuck in some veggies (hee hee) put the meat mixture in foil cupcake liners in muffin pans and then bake them off at 400 degrees for about 15-20 minutes. While those were cooking I peeled and boiled some potatoes until tender (I suppose you could use instant if you really insist). Then put in some butter and milk, salt and pepper. Mixed this up real good with an electric mixer. Please don't use your food processor here. It tends to make the potatoes all gluey. The key is to get them really smooth, so you may need a little extra butter or milk than the usual mashed potato mixture, just careful not to get them runny. Plop a spoonful on top of each baked meat muffin. If you want it to look extra convincing, add a few drops of food coloring to the potatoes when you mix them. I did pink. To be real fancy, I chopped up some red bell pepper and chives very tiny in the food processor to get something resembling sprinkles. I added these on top of the potato for decoration.


Happy Belated April Fool's Day!


Extremely Awesome Easter Eggs!

So I'm thinking, I bet you would like to make something super impressive to celebrate Easter, right? But you don't have a lot of time and it needs to be easy. I've got the thing for you! 


Here's what you do:


Eggs, raw (as many as you care to make)
water
vinegar (any kind will do)
rubber bands
old t-shirt (preferably white cotton)
silk neck ties (they must be silk, 100%)
enamel or glass pan for boiling (this is very important)

Begin by taking the neck ties apart. Cut off the labels and slit the seam up the back side. Remove the inner fabric and the lining fabric at both ends and discard. This doesnt have to be precise, just hack them out with scissors. Chop the silk part into lengths roughly 6-7" long.

Wrap each egg in a piece of silk. The silk must be placed with the "right" side against the egg. Wrap as tightly as possible and secure with rubber bands. Wherever you have wrinkles or folds, the pattern will be interupted; this can be a negative or possitive result depending on what you are trying to do with the design.

Cut the t-shirt up into pieces slightly larger than the neck-tie pieces. Now secure the t-shirt material around the egg. I generally do this by making a little "pony-tail" and putting a rubber band around that. The t-shirt keeps the silk tighter on the egg and also prevents the colors from bleeding from one egg to another.

Fill the pot with COLD water. Put in at least 1/2 cup vinegar or more for a very large pot. Gently place as many eggs into the pot as will fit. Place pot on the stove and bring to a boil. Reduce heat and simmer for 20 minutes. Remove from heat, drain and rinse in cold water. Leave eggs to cool in the sink.

Now comes the fun part! Carefully cut the rubber bands and unwrap the eggs to see your beautiful designs. I like to keep the egg cartons for storing the eggs in and also letting them dry in. Once the eggs are dry, you can rub a little bit of vegetable oil on each one to make them shiny if you like.

Voila. The hardest part is the rubber band process. I like to find the ties at Salvation Army or garage sales. You could also use silk yardage from a fabric store if you can find small prints in 100% silk.

The silk scraps can be rinsed and dried and put away for use next year. Each piece should have enough color to die 3-6 eggs before tossing.

Happy Easter everyone!