What to do? After about 3 nights of this, with no relief, I decided it was time to call in the professionals. My trusty Exterminator was put on notice and he arrived that very day with a trap baited with a can of stinky cat food and set it outside our bedroom doors next to the deck footing where the Raccoon had been living. The Exterminator assured me that this would do the trick.
 |
| Little Miss Trouble |
And it surely did! Just as darkness fell, we looked out the back windows and caught a glimpse of a masked marauder sniffing out the cat food bait, and SNAP, just like that... we bagged our first Raccoon! I was so excited that I called the Exterminator right then, even though it was near 10:00pm.
I decided I would sleep upstairs with the dog that night. I didn't want to hear her
Morning came, my husband told me he continued to hear the noises off and on all night, but since the dog wasn't downstairs to bark, it wasn't bad. I went out to check on our prisoner (I was actually afraid it might get loose somehow) and found what we discovered to be a female Raccoon "in heat" (pungent odor!) in the trap. All around the trap was blood. Blood on the outside of the trap, blood on the walls of the house, blood on the ground, blood on the garbage cans. GROSS! Obviously other Raccoon were fighting over her and we had quite a few of them! So much for our theory that there was just a breeding pair!
The Exterminator came to take the furry prisoner away (I really don't want to know about what he did with her) and set the trap again. After another day or so, this really wasn't necessary. Apparently the only reason the other Raccoon were present was to mate with the female, who was now gone. Problem solved.
So, what about next time? What's to stop more animals (possibly skunk? god forbid!) from taking up residence under our deck? The answer was nothing. We have dealt with this very question since moving into our house two years ago. Sometimes we had Raccoon, sometimes Woodchuck living under our deck. The Woodchuck hide underneath waiting for the perfect moment to snatch my vegetables or flowers from the gardens. I've tried digging barriers in, I've tried putting landscape timbers around the bottom of the deck, and even big rocks. No matter what I put there, they just dig under.
| Zareba Pet and Garden electric fence kit |
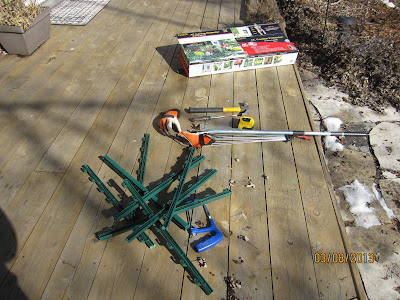
I ordered a kit designed for either keeping pets in, or keeping critters out. We're talking small critters, not deer. I modified the 30" posts so that I could create a very short fence (about 4-5" high) and have it completely underneath the face board of our deck. The electric wire was just far enough off the ground so if something tried to dig under, it would get a zap. Likewise, if something tried to climb over, it would also get a zap.
 |
| Fence post sticking out of the ground- I pushed them back underneath the deck so I won't shock myself while gardening and so plant material won't interfere with the electric current. |
I will keep this device operational all year long, in the hopes that no more animals decide that underneath our deck is a great place to live. I also hope this eliminates a lot of beasties eating my flowers and veggies this summer!
 |
| The most important step is to check the wire to make sure there is current flowing. This is safely done using a tester, rather than your hand! OUCH. |
 |
| I put caution signs up, just in case the critters can read. :0) |
 |
| This is the actual kit with various pieces before in installed them. Here's to happy sleeping, and a successful harvest! |

No comments:
Post a Comment