As I stood with my face pressed to the glass looking longingly out my back door at the garden, the rain and cold kept me safely inside the house. What to do with myself? So I got to thinking I needed some new garden markers for my new patch of bliss out back!
I put on my rubber garden clogs, a jacket and grabbed a wire trash can and headed out back to collect some baseball-sized rocks. I was looking for smooth-ish ones, not jagged or lumpy. The rocks need to have pretty flat areas for painting on. This isn't a big chore around my house as the previous owners had some sort of rock fetish and must have bought a dozen truck loads of rock in various shapes and sizes from small gravel sized all the way up to boulders almost as big as me!
 |
| rocks ready to be painted |
 |
| supplies I used: acrylic paint, water, rag, brushes, marker, clear lacquer |
All I needed to do was clean them up a bit, so a quick wipe down with damp cloth and let them set to dry for a little while. Then I was ready to get started.
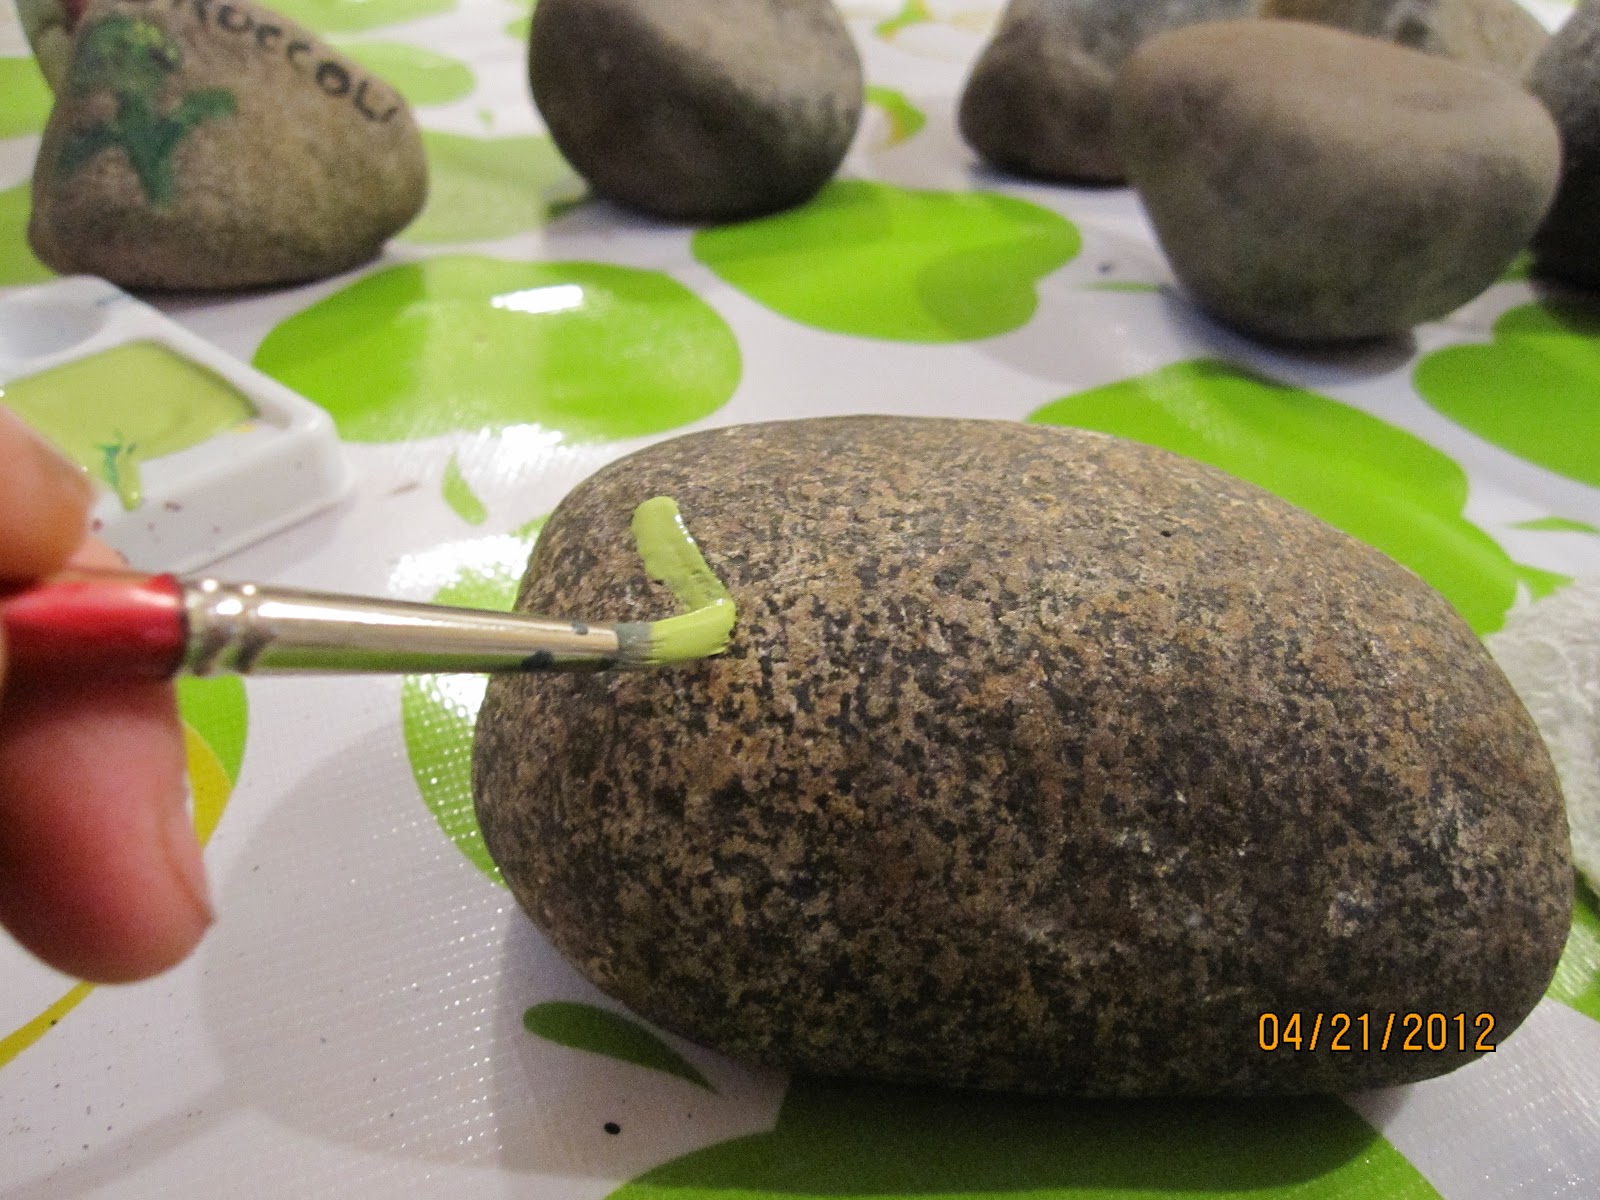
I began by painting rough shapes of the vegetable. You could just do words or anything you like, but don't be afraid of making "mistakes". They are just rocks. You could always bury them if they embarrass you! Or paint over them, or wash them off before the paint dries! Besides, the first coat will look pretty lame.
After the initial shape dries, go back with another color- maybe just slightly darker or lighter, and add a little shadow or highlight to begin defining shapes. For example on my "PEAS" rock, I started with a spring green pointed oval shape to represent the pod, then took a darker green and made round peas on top of the pod shape. You could make these very flat color combos so they look quite stylized and cartoon-like, or more gestural and less "perfect" like mine.
 |
| Starting is the hardest part |
After the second color(s) dry a bit, take some black paint and a small brush to put the lettering on. I decided the black didn't really read well, so I outlined in white. Perhaps it would be easier to paint a white band on first and then put the lettering on top of that, but you wouldn't get the shape of the letters. Either way would be fine, the band of white would be much easier to do though.
 |
| Add lettering using a small brush |
Once everything is completely dry, I took a fine point Sharpie (permanent) marker and drew in some details and outlines on the vegetable to really make it look the way I wanted it to. As you can see, the little painted veggies really begin to look nice at this point. They don't have to be perfect, but they should make you smile when you look at them rather than hang your head in shame. It's a fun project that serves a valuable purpose. It isn't rocket science or anything!
 |
| Two colors on the pea plus black lettering |
 |
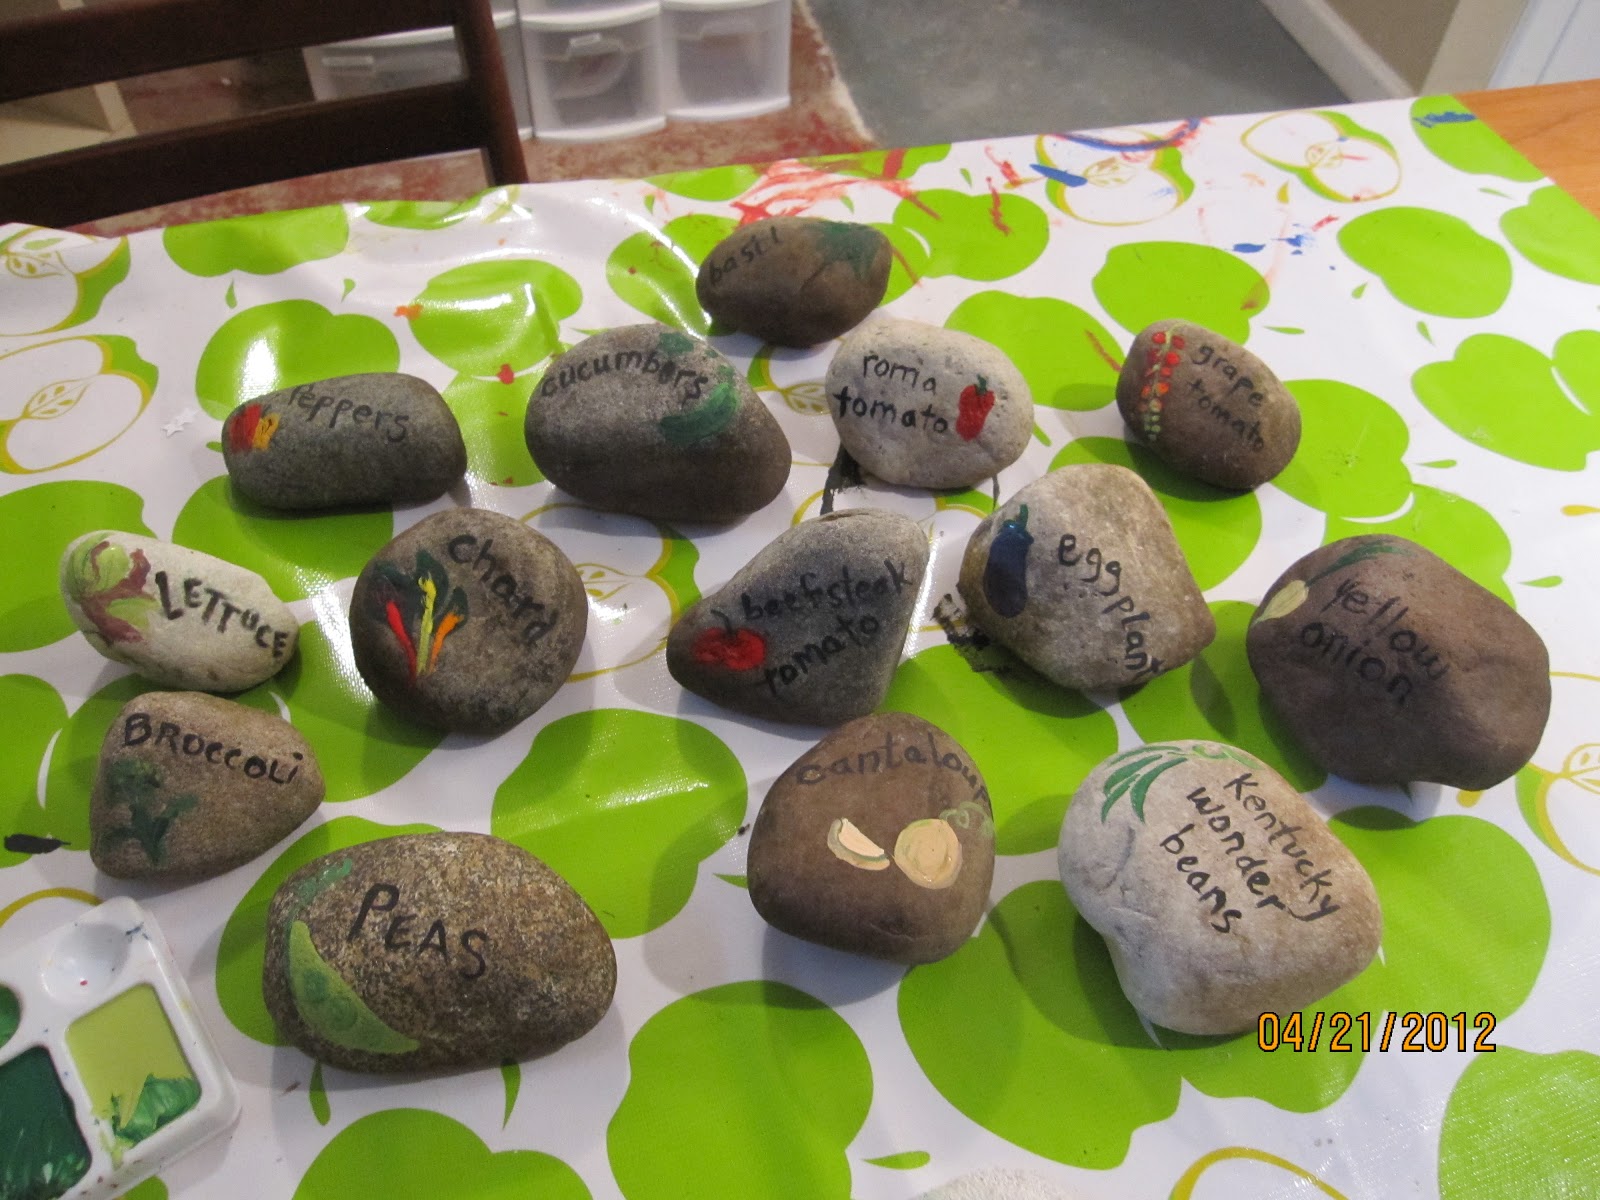
| Here are all my rocks with finished letters and veggies. They look kind of BLAH. |
 |
| adding white outlines to make the design "pop" |
 |
| Sharpie marker makes adding fine details easy |
 |
| painting complete |
 |
| finished rocks with clear lacquer coating ready for the garden |
To complete the job I took the rocks back outside once the sun came out and I put 3 coats of clear spray lacquer to preserve the paint job. These should hold up nicely for several years use.


Just found your blog while looking for a fence for the dumpsters. Yours is what I was imagining. And I LOVE the garden rocks! My garden is all in containers so I'm not in a dire need for markers but some day... Thanks for sharing!
ReplyDeleteTena from Minnesota